
How to Fletch Arrows With 4 Vanes – Using the New Bohning Heat Vanes
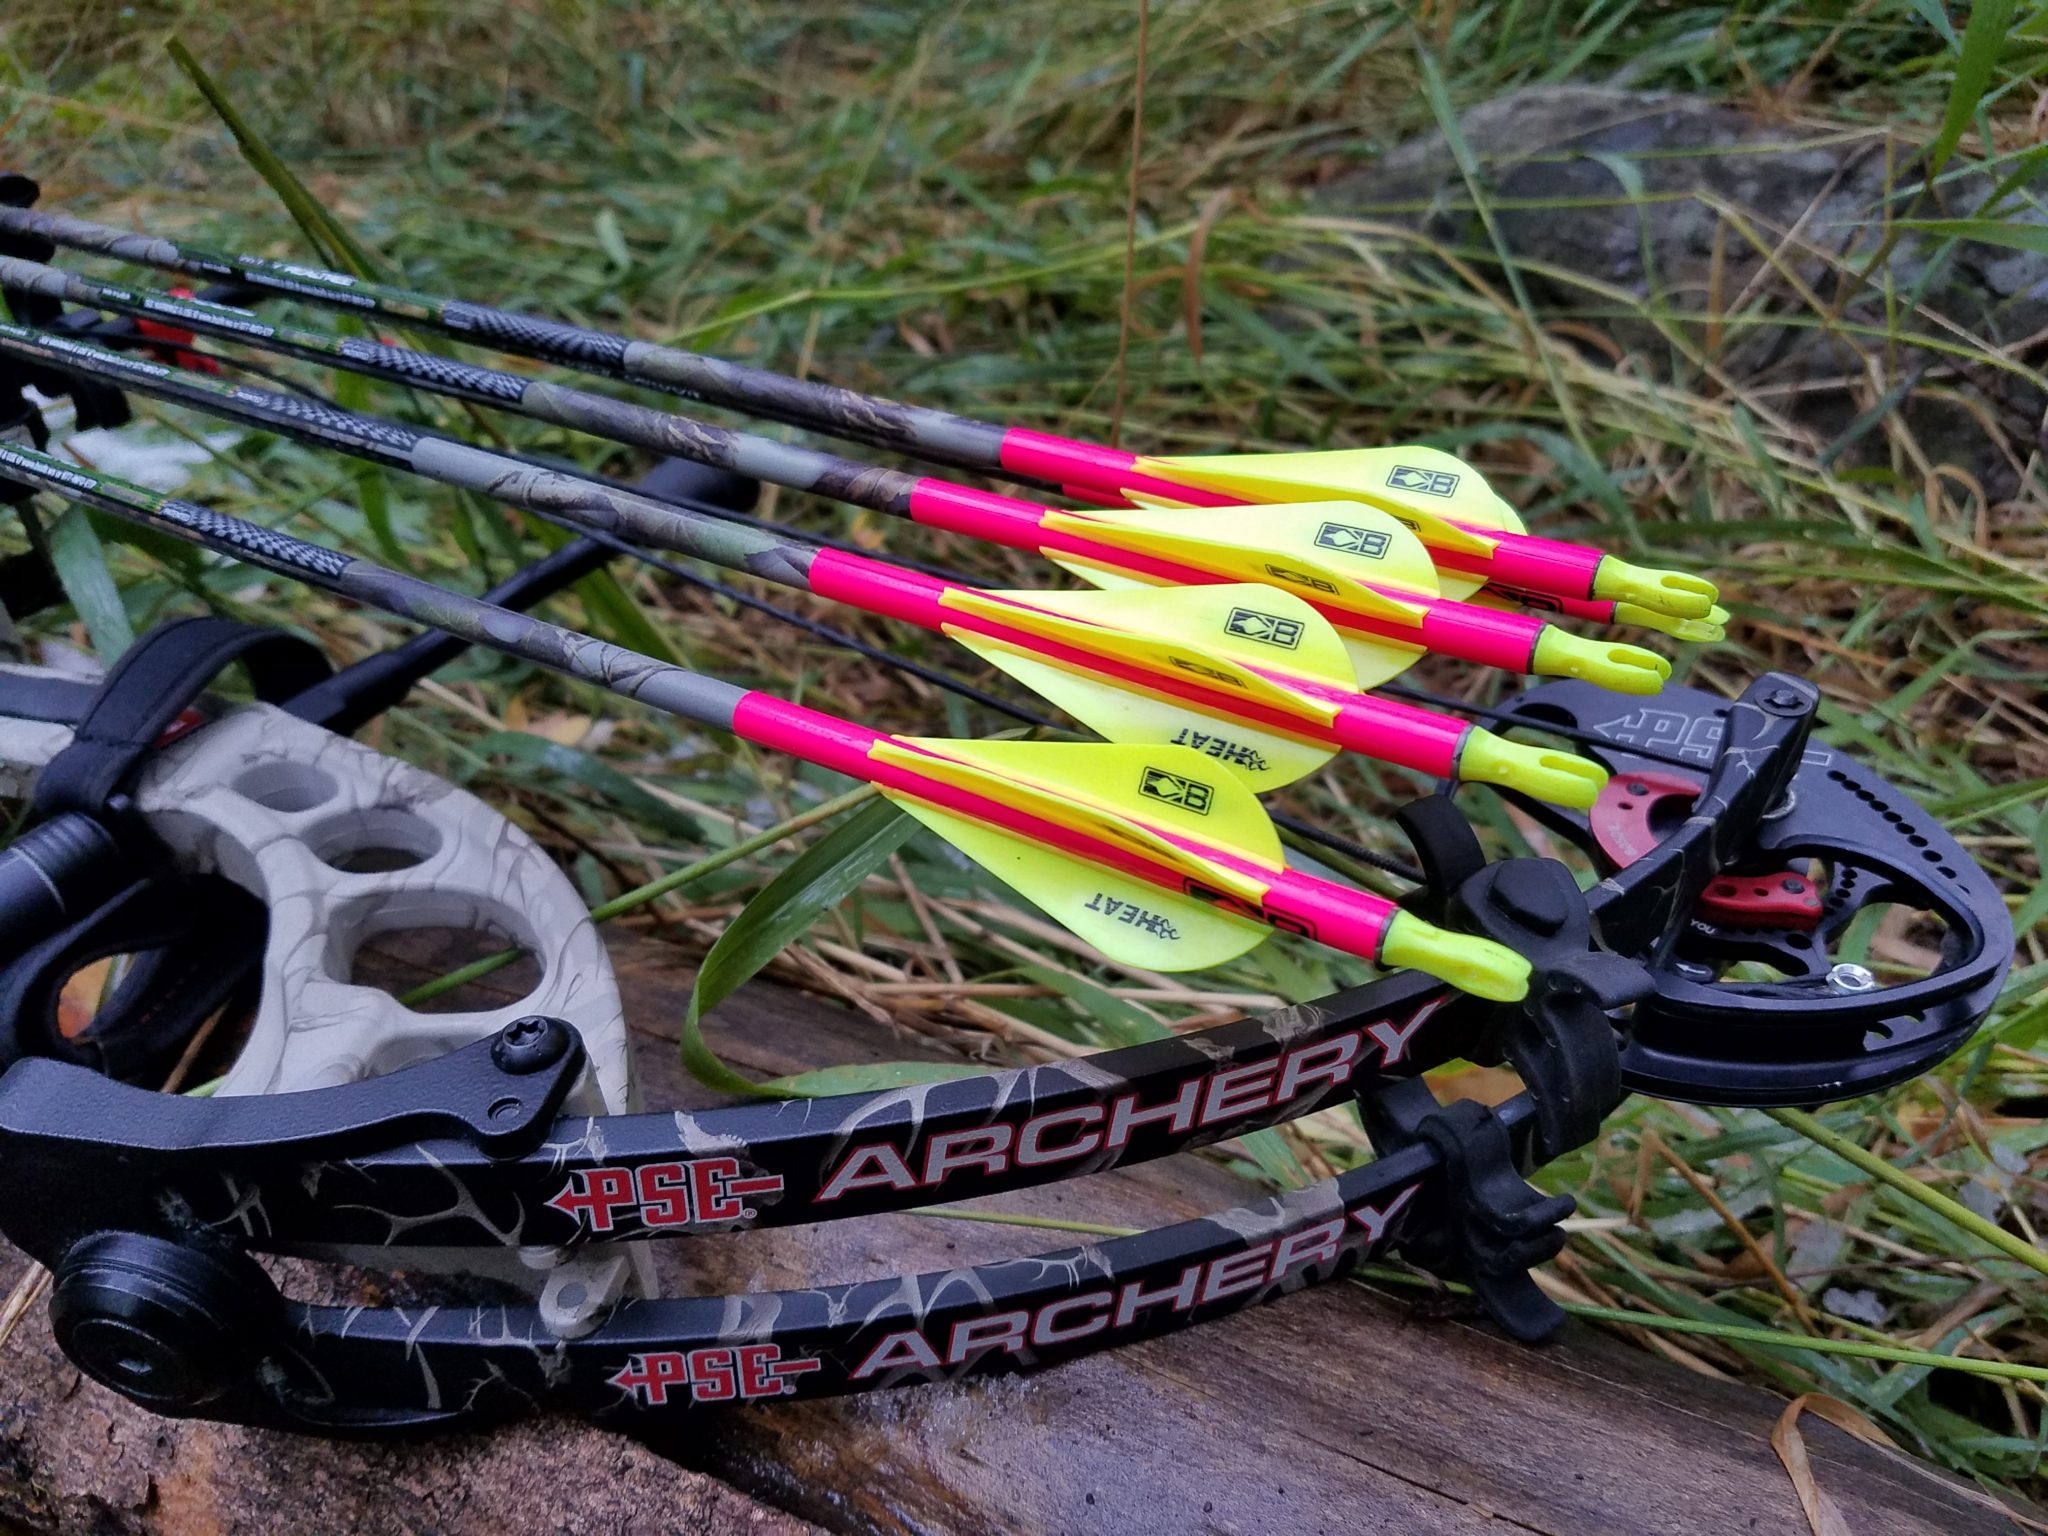
This season, I wanted to try something new with my arrow setup and look at adding some wraps, and trying some new vanes. The new Bohning Heat Vanes certainly fit the bill. I know we already covered how to prep for bow hunting season, and rebuilding arrows certainly weren’t on the list. I usually make it a point to have my arrows already built out and set in stone weeks before I’m hunting. but, my Blazer vanes from last season had seen some wear and tear, and a few were starting to come loose. I knew I needed to re-fletch if I wanted to be shooting my best all the way to the end of the season. When I first saw the new Heat vanes from Bohning, I was immediately intrigued. They weighed 6 grains, just like the regular Blazer vanes. The big change was how that weight was designed. The new Heat vanes traded height for length – 2.5” in length, 0.41″ in height, compared to the traditional Blazers at 2″ in length, 0.568″ in height. This, combined with a stiffer material, sounded like a winning combination to still steer my fixed blade broadheads, but producing a quieter vane with less susceptibility to crosswinds.
The average shooter uses 3 vanes on their arrows, and for the vast majority of shooters out there, this is perfectly effective. However, I fletch my arrows with 4 vanes instead of 3. But why fletch with 4 instead of 3? There are two reasons.
- More vanes = more stability
- No index vane needed
Archery is a never-ending game of give and take. Want more speed? You need to sacrifice some flexibility of accuracy. Want more accuracy? You’ll be sacrificing a little speed. As a western hunter shooting heavy arrows and fixed blade broadheads, I’ll pick accuracy over speed any day. Especially when shooting fixed blade broadheads. The more drag and spin you add to an arrow, the faster it steers your arrow and broadhead. With the new Heat vanes, the lower profile vane with 4 vanes instead of 3 provides for the same amount of drag you would get from larger, bulkier vanes or feathers in the traditional 3 fletch setup. To get the arrow to spin even faster, I fletch them with a 3 degree helical alignment, which sacrifices a slight amount of speed for even more rotation. This helps to get a flatter shooting trajectory, which is a win-win in western spot-and-stalk hunting.

When shooting 4 vanes in a 90° x 90° x 90° x 90° configuration and a drop-away arrow rest, you don’t have to worry about having an index vane. I keep all 4 vanes the same color, aligned with the nock, so that I don’t have to check to ensure my arrow is knocked correctly. In bowhunting, seconds count. And cutting out one less thing to check when knocking my arrow before drawing on a big buck of bull is pretty important in my mind.
So using an entire Bohning setup, I gave my arrows a full face lift. First things first, I had to strip off all my old vanes and get down to bare shafts.

This was no easy process, especially since I use instant-set super glue for my vanes. When it comes to adhesives, everyone has their own opinions. For me, I like the speed of using an instant-set glue like the Blazer Bond by Bohning. I’ve tried other super glues like Locktite, but I’ve found that Blazer Bond holds the best. Using pliers and the back edge of a knife, I pulled all the old vanes off and scraped the residual glue off to get the smoothest, cleanest surface possible. give it a quick wipe with an alcohol swab, and let your shafts dry.

Here’s a full list of all the supplies I used:
- Easton ST AXIS N-Fused Carbon Realtree Camo Arrow Shafts
- Blazer Heat Vanes – Neon Yellow
- 4″ Arrow Wraps – Hot Pink
- Bohning A-Nock arrow nocks – Neon Yellow
- Bohning Big Jig
- Blazer Bond instant set glue
- Arrow Scale – OMP Accu-Arrow scale
Now it’s time to get to work.
Whenever building out a set of arrows, it’s crucial to have the tightest weight tolerances possible. The closer you can get each arrow to match the rest, the more accurate you’ll shoot. The first step I take is to weigh all my components first, then sort them from heaviest to lightest. Even with the tight factory tolerances in vanes and nocks, there are slight weight differences. These actually help to customize the overall weight of your arrows. That way I can group my vanes and nocks and wraps together to match a heavier group with a lighter shaft, and a lighter group with a heavier shaft – ideally ending with all arrows being as close to identical as possible. My shafts already have the inserts glued in, so that is one less component I need to weigh when sorting out the overall calculated weight.


Next step – putting in the nocks. The Bohning A Nocks are an easy press-fit nock that doesn’t need any glue or other adhesive, which makes putting them in a breeze. One thing I did have a bit of a challenge with – they’re VERY tight, so it takes a little elbow grease and patience to push them in all the way without breaking or bending them.
It’s wrap time! I went with hot pink wraps, because nothing stands out better in the woods than hot pink. It’s almost entirely unnatural and catches the eye really well. Visibility is especially important when looking for an errant arrow from a missed shot – which I know I’m sure to do. Use a mouse pad or other slightly soft surface to apply the wraps to your shaft. Here’s a helpful video that makes it a breeze to put them on.


Now for the most important part – gluing the new Bohning Heat vanes, using the Bohning Big Jig with the 3° helical plate. Add a few drops of Blazer Bond to the edge of the Heat vane, then smooth the glue into a thin bead along the entire edge of the vane before placing it in the fletching jig and pressing it onto the shaft. I like to give it a little extra pressure for a few seconds just to ensure it sticks. Rotate the shaft in the jig, rinse and repeat.


As you work your way through each arrow, I take another weight measurement after gluing in all four vanes to get an updated weight of the entire arrow, minus the tip. This process does take a little while, even with instant set glue, so turn on the TV, watch something entertaining, and crank through each arrow, vane by vane.
And that’s it! See, wasn’t nearly as bad as you thought it would be, right?


Thought you were done, didn’t you? Not quite. Sure the arrows are done, but they aren’t REALLY done until they’ve been shot and sighted in. Even though these arrows aren’t deviating much from my old arrows, I did add a wrap to the back end, so the F.O.C. will be slightly affected. Before EVER considering hunting with newly built arrows, shoot them a lot to ensure that they’re shooting straight, your bow is correctly sighted in, and you can consistently ensure an ethical shot on any animal you pursue.

Once you’re confident they’re shooting straight, then comes the final test – take them out in the field and broadhead tune them. Oh, and don’t shoot your brand new vanes off like I did…

Now it’s time to get out and fill your next tag!


